Best triathlon gear with huge discounts. Online store backed by the security of Amazon.

The Triathlon Bike Saddle Nobody Fits Properly – And Why It’s Wrecking Your Run

The Triathlon Bike Saddle Nobody Fits Properly – And Why It’s Wrecking Your Run

You’ve dialled in your power meter, taped your nutrition to the top tube, and spent three months building your FTP. But the moment you rack your bike in T2 and start running, your hips feel like they’ve been locked in a vice. Your glutes won’t fire. Your stride is short and shuffling. And you have no idea why.

The saddle is almost always the reason. Specifically, a saddle that nobody has ever properly fitted to you.

What Does a Poorly Fitted Saddle Actually Do to Your Body?

A bad saddle fit compresses soft tissue, restricts hip flexor range of motion, and shifts load onto muscles that were never meant to carry it for 40K or 90K. That’s not a comfort issue – it’s a biomechanical problem that follows you off the bike and straight into the run.

When a saddle is too high, too tilted, or the wrong width, your pelvis rocks side to side to compensate. Do that for two hours and your glutes and piriformis are pre-fatigued before you’ve laced your running shoes. Studies on cycling-to-running transitions (commonly referenced in sports science literature from Millet and Vleck, 2000 onward) consistently show that hip extension mechanics in the first kilometre of the run are directly tied to bike position, not just accumulated lactate.

Why Triathlon Saddles Are a Different Problem Than Road Cycling Saddles

Triathlon-specific saddles are designed for an aggressive forward position – think ISM Adamo, Specialized Sitero, or the Fizik Tritone. They’re shorter, often nose-free or split-nose, and built to reduce perineal pressure so your hip flexors aren’t compressed when your torso is slammed low over the bars.

The problem is that most triathletes either buy one of these on recommendation, slam it on the bike at a roughly flat angle, and never think about it again – or they run a standard road saddle that was chosen for a completely different body position. Neither approach is a fit. It’s a guess.

A saddle fit for a triathlon-specific position needs to account for:

  • Sit bone width – measured in millimetres, not estimated by feel
  • Pelvic tilt in an aero position – which is different from your sit-bone width in an upright position
  • Saddle height relative to the BB – small changes (5mm) meaningfully change how your hip clears the top of the pedal stroke
  • Fore-aft position – which affects whether your quads or glutes are doing the work, and which muscles arrive at T2 with something left

How to Tell If Your Saddle Is Actually the Problem

These are concrete signs you have a saddle fit issue, not just general fatigue:

  • Your glutes feel “dead” or numb within the first 1-2km of your run
  • You have inner thigh or hip flexor tightness that doesn’t resolve during the run warm-up
  • You’re chafing asymmetrically (one side more than the other) – this almost always indicates pelvic rocking
  • Your power drops significantly in the final 20K of the bike, but your legs feel fine on training rides of the same duration
  • You’ve gone through more than two saddle changes in a season trying to find something comfortable

Any one of these on its own can have other causes. All of them together, and the saddle is a very strong suspect.

How to Actually Fix It Before Race Day

Get a proper bike fit from a fitter who understands triathlon geometry – not just road cycling. This means someone working with a tool like Retül, Guru, or a video-based system who can assess you in your actual aero position, not sitting upright. Expect to pay £150-£300 for a full session. That’s less than most triathletes spend on a single pair of race wheels.

Before the fit, do this:

1. Measure your sit bone width using the cardboard method (sit on cardboard, measure the two indentations, add 20-25mm for a road position or 10-15mm for an aero position) 2. Bring your current saddle to the fitting – a good fitter will work with what you have before recommending a replacement 3. Book it at least 8-10 weeks before your A-race so you have time to adapt and test

After the fit, ride at least three sessions – including one at race duration – before calling it done.

FAQ

Does saddle height actually affect run performance? Yes. A saddle that’s too high forces hip drop at the bottom of the pedal stroke, pre-fatiguing the glute medius and disrupting run stride mechanics. Even a 5-8mm adjustment can change this.

What’s the best saddle for triathlon? There’s no single answer, but ISM, Specialized, and Fizik make purpose-built triathlon saddles. The right one depends on your sit bone width, pelvic angle, and flexibility – which is why a fit comes before a purchase.

How long does saddle adaptation take? Most riders need 4-6 weeks of regular riding to fully adapt to a new saddle position. Don’t race on a saddle you’ve had for less than a month.

Can I fix saddle fit without paying for a professional fitting? You can make meaningful improvements yourself using online resources and the cardboard sit bone test, but a professional fit will identify tilt, fore-aft, and height issues that are almost impossible to self-diagnose accurately.

Should my triathlon saddle be the same as my road bike saddle? Usually not. The forward pelvic rotation in an aero position changes which soft tissue is bearing load. A saddle designed for an upright road position will often cause more perineal compression and hip restriction when used in a tri position.

The bottom line: Saddle fit is not a comfort preference. It’s a performance variable that directly affects how well you run after the bike. If you’ve never had a proper fit, you’re leaving time on the course – and you’re probably running on pre-fried glutes while wondering what went wrong.

The Triathlon Race Belt Nobody Upgrades – And the Hidden Cost of That Decision on the Run

The Triathlon Race Belt Nobody Upgrades – And the Hidden Cost of That Decision on the Run

You’ve spent $3,000 on a bike, $400 on a wetsuit, and $180 on running shoes. Your race belt cost $12, came in a goody bag at your first sprint tri, and you’ve never once questioned it.

That’s the problem.

The race belt is the most ignored piece of kit in triathlon. It’s also the one that can quietly wreck your run – through chafe, number rotation, and the kind of low-grade annoyance that compounds over miles into real time lost.

Why Does a Race Belt Actually Matter on the Run?

A poorly fitted race belt shifts, rides up, and causes chafe – all of which affect your run mechanics and focus during the most mentally demanding leg of any triathlon. That’s not speculation; it’s physics and friction.

Here’s what actually happens with a bad belt:

  • Number rotation: When the belt slides or twists, your bib moves to your hip or back. That’s a penalty risk in races with number visibility rules, and it creates a dead-weight drag sensation you’ll definitely notice by kilometer three.
  • Chafe: A cheap elastic band sits against skin or a thin trisuit with zero padding. Over a 10K or a half-iron run, that contact zone becomes a problem – especially if you’re sweating hard or running through aid station water.
  • Cognitive load: It sounds minor, but constantly adjusting your belt mid-run burns mental bandwidth you need for pacing and effort management.

The race belt isn’t glamorous. That’s exactly why it’s worth thinking about for five minutes before your next race.

What Separates a Good Race Belt from a Bad One?

The difference comes down to three things: clip mechanism quality, elastic width and texture, and gel loop placement. Everything else is cosmetic.

Clip mechanism: Budget belts use thin plastic buckles that pop open under tension – particularly if your trisuit is slightly damp. Look for a reinforced double-click clasp. The Nathan Speed Draw belt and the Flipbelt Race Belt both use wider, sturdier buckles compared to the generic single-pin clips that come in race kits.

Elastic width and texture: A 25mm flat elastic band sits more stably against a trisuit than a 10mm cord. Wider bands distribute tension, which means less rotation. Silicone-grip backing – found on belts like the Ronhill Race Belt – adds friction against the suit and dramatically cuts mid-run shifting.

Gel loops: If you’re racing anything longer than a sprint, you need gel loops. A belt without them forces you to carry nutrition in your trisuit pockets or hand-carry gels – both of which affect arm swing and comfort. Most race-ready belts in the $20-$35 range include four to six loops. That’s the sweet spot.

When Should You Actually Replace Your Race Belt?

Replace your race belt if the elastic has lost its recovery, the buckle requires force to clip, or you’ve ever had to stop and adjust it during a race. Any one of those is enough.

Elastic degrades. A belt that sat in your kit bag through a winter of temperature swings is not the same belt it was. If you can stretch it to its full length and it doesn’t snap back with tension, it’s done.

Cost isn’t a barrier here. A solid replacement – the Decathlon Aptonia Race Belt, for instance – runs about $8 to $12 and outperforms most freebies in every measurable way. Spending $25 to $35 gets you the silicone grip and better gel loops. That’s the ceiling; there’s no reason to spend more.

The Right Way to Set Up Your Race Belt in T2

Route the belt so the buckle sits at your hip, not your spine or stomach – this is the single best adjustment most triathletes never make. Side-clipping keeps the hardware off your lower back and away from the front of your pelvis where it can interfere with stride.

Thread your gels before the race. Load them in T1 so your T2 is just grab-and-go. Practice clipping the belt once or twice in training so there’s no fumble under race pressure.

Frequently Asked Questions

Does a race belt slow you down compared to pinning a number? Negligibly. The aerodynamic difference is immeasurable at amateur speeds. The real performance factor is comfort and stability – which a good belt handles better than pins through a trisuit.

Can I wear a race belt over a wetsuit? No. The belt goes on in T1 after wetsuit removal. Most race rules require your number to be visible on the run, not the bike, so this isn’t a practical issue.

How tight should a race belt be? Snug enough to stay in place at race pace, loose enough to fit two fingers underneath. If it’s leaving a mark, it’s too tight.

Do I need a different belt for sprint vs. iron-distance racing? For sprints, any stable belt works. For 70.3 and full iron-distance, prioritize gel loops and a wider elastic band – you’ll be wearing it longer and you’ll need the storage.

Are race belts with pockets worth it? Only if you’re racing long-course and have specific nutrition or phone needs. For most Olympic-distance and under, the extra bulk isn’t worth it.

The bottom line: your race belt is a $15-$35 decision that affects every run you race. It’s not the flashiest upgrade, but it might be the most overlooked one. Check what you’re currently using. If it came free, it’s probably time to replace it.

Triathlon Running Gear: The Complete Guide to Every Piece of Kit You Need

Triathlon Running Gear: The Complete Guide to Every Piece of Kit You Need

The run leg makes or breaks a triathlon. You’ve already swum and cycled – your legs are fatigued, your core is working overtime, and the gear you’re wearing needs to carry you across the finish line without slowing you down or causing problems. This guide covers every piece of triathlon running gear you need, from race-day shoes and trisuits to nutrition systems and performance accessories. Whether you’re toeing the start line of your first sprint or building toward a 70.3, you’ll find specific recommendations, honest trade-offs, and practical guidance on what’s worth spending money on – and what isn’t.

What Makes Triathlon Running Gear Different From Standard Running Gear?

Triathlon running gear is designed to work after two preceding disciplines, not in isolation – that distinction drives almost every design decision.

Standard running gear is optimised for comfort over a standalone run. Triathlon-specific gear is optimised for fast transitions, wet skin, sustained heat across multiple hours, and the unique biomechanical fatigue pattern that follows cycling. A thick-cushioned road shoe is excellent for a Sunday long run. It’s a liability in T2 when you’re trying to get it on over damp, swollen feet in under 20 seconds.

Key differences include:

  • No inner socks in race shoes (or elastic laces to avoid needing socks at all)
  • Quick-dry fabrics that don’t absorb water from the swim or sweat
  • Minimal seams to prevent chafing over long efforts
  • Ventilation priority over insulation
  • Secure but fast-to-don construction – buckles, BOA dials, or elastic lacing over traditional knots

Understanding this context stops you from making expensive mistakes – like buying a technically excellent running shoe that’s a nightmare in a race transition.

What Triathlon Running Shoes Do You Actually Need?

The right triathlon running shoe fits well while wet, goes on quickly, and holds up over the distance you’re racing.

Sprint and Olympic Distance Shoe Priorities

For shorter races (up to 10km run legs), transition speed matters more than long-run cushioning. Look for:

  • Elastic or speed laces – brands like Xtenex, Caterpy, or the built-in elastic systems on Hoka and New Balance tri editions
  • Heel loops – a simple loop at the collar lets you drag the shoe on without using your hands to open it
  • Breathable mesh uppers that drain water quickly if your feet are still damp from T1

Strong performers in this category include the New Balance FuelCell SuperComp Pacer and the Saucony Kinvara Pro – both fast, light, and adaptable to race lacing.

Half and Full Iron-Distance Shoe Priorities

For 13.1- to 26.2-mile run legs, the calculation shifts. You need cushioning and fit stability that holds up after 56 or 112 miles on a bike. This is where a shoe like the Hoka Rincon 3 or the ASICS Novablast 4 earns its place – they combine enough cushioning for late-race comfort with a streamlined enough fit to go on quickly in T2.

One practical note: at 70.3 and full Ironman distances, most athletes are better off with a sock (to prevent blistering over 13+ miles) than chasing a slightly faster transition. Pre-position a thin no-show tri sock inside your shoe in transition setup.

Do You Need Triathlon-Specific Running Shoes?

No – you need a running shoe that works under triathlon conditions. True tri-specific running shoes (like older Zoot or De Suca models) are less common now because mainstream performance running shoes, with the right lacing modification, are equally capable. The label matters less than the features.

Which Trisuit Is Best for the Run Leg?

A trisuit needs to function across all three disciplines, but its construction has a significant effect on run comfort specifically.

What to Look for in a Trisuit for Running

The chamois (padding) is the most important run-specific factor in a trisuit. A chamois that’s thick enough to protect on the bike becomes a heavy, uncomfortable problem on the run. Look for suits with a thin, quick-dry chamois – typically 5-8mm – rather than the 10-15mm pads found in standard cycling bib shorts.

Other run-specific trisuit considerations:

  • Compression level – moderate compression through the hip and quad supports run form without restricting stride
  • Flatlock seams on the inner thigh and waistband prevent hot spots over long run legs
  • Back pockets – a single small pocket is useful for a gel or CO2; avoid suits where back pockets add bulk to the shoulder or neck area, which causes chafing during the run arm swing
  • Fabric breathability – materials like Elastic Interface, Compressport’s R2, or Castelli’s KISS Air chamois fabrics manage heat and moisture well

Well-regarded trisuits for run comfort include the Castelli Free Sanremo 2 (excellent all-round performance, reliable chamois) and the Compressport Triathlon Brutal Suit (strong compression, fast-drying, good for hotter conditions).

One-Piece vs. Two-Piece: What’s Better for the Run?

For most triathletes, a one-piece trisuit is the better choice – there’s no waistband to dig in, no top riding up, and no chance of the two pieces separating mid-run. Two-piece setups (tri shorts plus top) offer flexibility for fit and temperature regulation but introduce more chafing risk over long run legs.

What Socks Do Triathletes Need for the Run?

For sprint and Olympic distances, many experienced triathletes run sockless to save transition time. For anything longer, socks are almost always the right call.

Tri-specific socks like those from Balega, Swiftwick, or Zensah are thinner than standard running socks, wick moisture aggressively, and have minimal seaming at the toe. They’re designed to go on quickly over wet or damp feet.

Key specs to look for:

  • No-show cut – sits below the collar of the shoe and doesn’t bunch
  • Compression fit at the arch – keeps the sock from sliding during the run
  • Moisture-wicking fiber – merino blends or synthetic (CoolMax, Drymax) outperform cotton entirely

Avoid thick trail-running socks for triathlon run legs. They absorb sweat, take longer to put on, and can cause blistering once wet.

What Running Accessories Are Worth Carrying on Race Day?

Every gram and every second counts on race day. The accessories worth using are the ones that either protect your performance or prevent a race-ending problem.

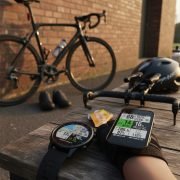
GPS Watch

A GPS watch is the single most useful piece of triathlon running gear outside of shoes. It lets you manage your run pace from the first step out of T2 – critical, because adrenaline and bike fatigue combine to make effort feel misleading early in the run leg.

Garmin Forerunner 965 and Polar Vantage V3 are the current benchmarks for triathlon-focused watches. Both offer multisport mode (continuous tracking across swim, bike, run without losing data), running power, and heart rate. The Apple Watch Ultra 2 is a capable alternative for athletes already in the Apple ecosystem, though its triathlon multisport integration is less seamless than dedicated triathlon watches.

At minimum, use the watch to confirm your first-kilometre pace – if you’re 15-20 seconds per kilometre faster than your target, you’re already in deficit spending.

Running Hat or Visor

Sun exposure on the run leg, especially in half and full iron-distance events that put athletes on the course in midday heat, is a genuine performance issue. A lightweight running cap or visor can reduce core temperature perception meaningfully.

  • Headsweats Supervisor and Brooks Chaser are popular choices – both are light, vent well, and have sweatbands that don’t saturate quickly
  • A visor is slightly cooler than a cap but offers less UV protection on the top of the head
  • Pre-position the cap in T2 or, at longer distances, consider aid-station ice placement under the cap from mile 3 onwards

Sunglasses

Sunglasses aren’t optional on bright-day races – squinting for 40 minutes degrades run form through neck and shoulder tension. Keep the same pair from the bike or switch to a lighter frame in T2.

  • Oakley Sutro Lite or Rudy Project Spinshield Air are solid tri-crossover options
  • Transition tip: pre-position sunglasses open on top of your run shoes so you can slide them on in a single movement

Race Number Belt

A race number belt is a small item with a real impact on transition speed. Clipping a pre-set number belt takes two seconds. Pinning a number to your trisuit takes two minutes and risks damaging the fabric.

Nathan SpeedDraw, Flip Belt, and basic elastic belts from Ronhill or HUUB all work well. Choose one with at least one gel loop if you’re carrying your own nutrition rather than relying entirely on course stations.

How Should Triathletes Handle Nutrition on the Run Leg?

Triathlon run nutrition means managing a deficit you built up over the swim and bike, not starting fresh.

What to Carry vs. What to Take at Aid Stations

At sprint and Olympic distances, most athletes can rely on course aid stations alone (water and electrolyte drink every 2-3km). At 70.3 and Ironman distances, you need a personal nutrition plan that uses the course stations as a baseline and fills gaps with your own tested products.

What to carry on the run:

  • 1-3 gels in your trisuit back pocket or on a race belt gel loop (for a 70.3 run leg, aim for one gel every 30-40 minutes depending on body weight and intensity)
  • A small salt capsule (SaltStick, Precision Hydration, or Nuun Sport tabs) if you’re racing in heat above 25°C
  • Nothing else – weight adds up and most mid-distance runners can manage on aid station fluids with a small personal gel supply

What to avoid:

  • Solid food (bars, bananas) in the first 30 minutes of the run leg – gastric motility is suppressed early in the run transition from bike and solids can cause nausea
  • Trying new products on race day – this is obvious advice, but athletes still do it. Every gel or drink you take on race day should have been tested in training

Hydration Strategy

Drink to thirst on runs under 90 minutes. For longer run legs, use a time-based approach: small sips (150-200ml) every 15-20 minutes from course stations, supplemented with electrolytes if you’re a heavy sweater or racing in heat.

What Training Equipment Do Triathletes Use to Improve Run Performance?

Race-day gear gets the attention, but training equipment is what actually builds the run leg.

Foam Rollers and Recovery Tools

Running off the bike creates specific tightness patterns – hip flexors, IT band, and calves bear the brunt of the bike-to-run transition. A foam roller (the Trigger Point GRID remains the reliable standard) and a lacrosse ball for targeted hip flexor work are the two most cost-effective recovery tools in a triathlete’s kit.

Percussion massage devices like the Therabody Theragun Prime are effective post-run and pre-run activation tools, particularly for cyclists who struggle with quad activation when the run starts. They’re a genuine investment at £249-£299, but durable and useful across all three disciplines.

Brick Training and the Gear Setup It Requires

Brick workouts (bike followed immediately by run) are the most sport-specific training sessions a triathlete does. To run these sessions effectively, you need:

  • Your race-day run shoes already set up by the bike
  • Your GPS watch in multisport mode to track the transition
  • If training outdoors, a simple transition spot – a towel, shoes, and your run number
  • If using a turbo trainer for the bike portion, easy access to your run gear for a T2 simulation

Running your first few bricks in race kit (including your trisuit and race shoes) helps identify fit or comfort problems before race day, not during it.

Strength and Conditioning Equipment for the Run Leg

A single resistance band (particularly a hip circle from brands like Perform Better or Gymreapers) is one of the most efficient pieces of triathlon training equipment for the run. Hip abductor and glute activation work with a band directly addresses the quad dominance that cycling creates – a major contributor to poor run form in the first few kilometres off the bike.

Other useful items:

  • Calf raise platform for eccentric loading, which reduces Achilles and plantar fascia issues common in high-volume triathlon training
  • Jump rope for foot turnover and proprioception work (less joint stress than plyometric drills on hard surfaces)
  • GPS/running power meter – the Stryd pod (clips to shoe laces) gives running power data that’s more consistent than GPS pace on hilly courses and in wind

What’s the Difference Between Budget and Performance Triathlon Running Gear?

Budget gear gets you to the finish line. Performance gear makes the experience faster and more comfortable – but the returns diminish quickly above a certain price point.

CategoryBudget OptionMid-Range OptionPerformance Option
Run shoesSaucony Kinvara 14 (~£100)Hoka Rincon 3 (~£130)New Balance FuelCell SuperComp Pacer (~£200)
TrisuitZone3 Activate (~£65)HUUB Commit Long Course (~£130)Castelli Free Sanremo 2 (~£280)
GPS WatchGarmin Forerunner 55 (~£170)Garmin Forerunner 265 (~£350)Garmin Forerunner 965 (~£580)
Race SocksBalega Hidden Comfort (~£14)Swiftwick Aspire Zero (~£16)Zensah Tech+ (~£20)
Race BeltRonhill Race Belt (~£8)Nathan Race Number Belt (~£12)Flip Belt (~£30)

Honest take: The biggest performance returns come from shoes and watch – not from premium trisuits or race belts. A £65 trisuit on a well-trained athlete will beat a £280 trisuit on an undertrained one. Spend where the gear directly affects output (shoes, watch), save where it doesn’t (belts, caps, basic socks).

Frequently Asked Questions About Triathlon Running Gear

Do I need triathlon-specific running shoes, or can I use regular running shoes? You don’t need shoes marketed specifically as “triathlon” shoes. You need running shoes that fit well while wet, go on quickly, and suit your foot type and the distance you’re racing. Most modern performance running shoes, fitted with elastic laces, meet those requirements. Brands like Zoot still make tri-specific models, but they’re not necessary.

Should I wear socks for the run leg in a triathlon? For sprint distances (up to 5km run), sockless is viable if your shoes fit well and you’ve trained sockless. For Olympic distance and above, socks are strongly recommended – the blister risk over 10km+ outweighs the 10-15 second transition saving for most athletes.

How do I stop my legs from feeling dead at the start of the run leg? The heavy, fatigued feeling in the first 1-2km of the run is normal and largely unrelated to fitness – it’s the biomechanical shift from cycling muscles to running muscles. Regular brick workouts (bike straight into run) train your body to make this switch faster. From a gear standpoint, a well-fitted trisuit with moderate compression through the quad can help with proprioception and early-leg feel.

What should I put in my T2 transition for the run leg? At minimum: shoes (with elastic laces pre-tied), race number belt (pre-clipped with number attached), and any nutrition you’re carrying. Optional additions: cap or visor, sunglasses (pre-opened on your shoes), socks (pre-positioned inside shoes if using them). Keep T2 simple – every extra item is a decision point under fatigue.

Is a running power meter worth it for triathlon training? For athletes who train consistently by data and already use a cycling power meter, adding a Stryd running power pod is a logical next step. It costs around £200 and provides consistent effort data that GPS pace alone can’t give on variable terrain. For athletes newer to data-based training, mastering heart rate and perceived exertion first is more practical.

Conclusion

Triathlon running gear isn’t about collecting every available piece of kit – it’s about knowing which items solve real problems and which are marketing noise. Your shoes and your watch matter most. Your trisuit needs a chamois that works on both the bike and the run. Your accessories need to be fast to put on and light enough to forget you’re wearing them.

Start with the essentials: a well-fitted pair of race-ready running shoes with elastic laces, a reliable trisuit, a GPS watch in multisport mode, and a race belt. Everything else – recovery tools, running power meters, compression socks, specialty nutrition systems – builds on top of that foundation once you understand what your run leg actually needs.

Test everything in training. Set up your T2 exactly as it will be on race day. And remember that the best piece of triathlon running gear is the one you’ve trained in enough to trust completely.

In this guide

What to Wear on the Triathlon Run Leg: Trisuit, Shorts, or Running Kit Explained

This article is part of our complete guide: Triathlon Running Gear: The Complete Guide to Every Piece of Kit You Need.

What to Wear on the Triathlon Run Leg: Trisuit, Shorts, or Running Kit Explained

Choosing what to wear for the triathlon run leg is one of those decisions that feels minor until you’re 8km into a half-iron run with chafing shorts or soaked cycling kit slowing you down. Get it right and T2 costs you 45 seconds. Get it wrong and the run costs you a position – or a skin layer.

Here’s what actually matters, broken down by kit option and race context.

Should You Race the Run in a Trisuit or Change into Running Kit?

For most triathletes, racing in a trisuit for the run leg is the right call. A well-fitted trisuit is designed to transition directly from bike to run without a kit change, saving time and avoiding the discomfort of wet, bunched fabric.

A trisuit’s run pad is thinner than a cycling bib short pad, which becomes an advantage on the run – thick chamois that works on a 90km bike ride becomes awkward and heavy once you’re on your feet. Modern trisuits from brands like Zone3, Castelli, and Zoot use fabrics that dry quickly, wick sweat, and don’t restrict stride.

The argument for changing into a dedicated running kit usually comes down to distance and personal comfort. In an IRONMAN, some athletes carry a run kit in their T2 bag – dry shorts, a fresh top – because the 42.2km run warrants more comfort investment. In a sprint or Olympic distance, that same change costs you a minute you won’t get back.

When a trisuit makes sense:

  • Sprint and Olympic distance events
  • When your T2 target is under 90 seconds
  • When your trisuit fits well and has already been tested in training

When a kit change might pay off:

  • IRONMAN-distance events where comfort over 4+ hours outweighs the time cost
  • Athletes with significant chafing or fit issues in their current trisuit

Are Triathlon Running Shorts a Useful Middle Ground?

Triathlon-specific run shorts – sometimes called tri shorts – offer a legitimate compromise, particularly for athletes who dislike the full one-piece feel of a trisuit. They pair with a race-legal swim/run top and can be worn straight from the water through the entire race.

Tri shorts typically feature a thin, quick-dry chamois and a snug waistband with minimal bulk. The Orca Core Tri Short and the 2XU Perform Tri Short are commonly used examples at the £45-£80 price point. Unlike standard running shorts, they don’t have an inner liner that retains water after the swim.

The tradeoff is aerodynamics and top coordination. A two-piece setup introduces more points of failure – a top that rides up, a waistband that rolls – and adds minor drag compared to a one-piece suit. For competitive athletes pushing for podium spots, that matters. For those targeting a personal best at a local sprint event, it matters a lot less.

What About Racing the Run Leg in Standard Running Kit?

Standard running shorts and tops are not designed for triathlon and create real problems on the swim and bike legs – but if you’re racing a run-only leg or doing a duathlon, they’re obviously fine.

Within a triathlon, standard running shorts worn from T1 onward will absorb water, add weight, and create friction that worsens as the race progresses. A standard running vest or technical t-shirt has no structural support during the bike and can bunch or shift. These aren’t theoretical issues – they show up reliably during race conditions.

The exception: if your race uses a full wetsuit and you plan to put on a complete run kit in T2 (with a changing tent), you can wear anything comfortable under the wetsuit. This is an option at IRONMAN events with changing tents but adds 3-5 minutes to your transition time in practice.

Trisuit vs. Tri Shorts vs. Running Kit: A Quick Comparison

OptionBest ForTransition TimeComfort Over Long DistanceAero
One-piece trisuitSprint, Olympic, 70.3FastestGood if fitted wellBest
Tri shorts + topSprint, OlympicFastGoodModerate
Run kit changeIRONMANSlowestBestN/A
Standard running shortsNot recommendedN/APoor (wet fabric)Poor

What Else Should You Think About for the Run Leg?

Beyond shorts and suits, a few accessories make a meaningful difference to what you wear for the triathlon run leg.

Race number: You need to display your number on the run (front-facing). A race belt – like the Nathan Trail Mix+ or the Ronhill Race belt – is standard and faster than safety pins. Clip it in T2 and rotate it to your front as you leave.

Socks: Personal preference and race distance both factor in. Many sprint racers run sockless to save 20-30 seconds. Over 21km+, most athletes wear socks – thin, quick-dry options like Balega Hidden Comfort or Swiftwick Aspire Zero. If you’re running sockless, apply Body Glide or Vaseline to hot spots before the race.

Cap and sunglasses: A lightweight running cap protects from sun and can double as a visor. If you’re wearing cycling sunglasses already, they typically work fine on the run. If not, keep a pair in T2 – squinting for 10km in full sun costs focus.

Tri-specific running shoes: Shoes with heel loops or speed laces – like the Hoka Clifton 9 or On Cloudsurfer – allow fast transitions. This is a shoe question as much as a kit question, and it’s covered in detail in our Triathlon Running Gear: The Complete Guide to Every Piece of Kit You Need.

FAQ: What to Wear for the Triathlon Run Leg

Can I wear a wetsuit on the run leg? No. Wetsuits are removed in T1 after the swim and left at your transition station. You race the bike and run in your base layer – trisuit, tri shorts, or similar.

Do I need a sports bra under my trisuit? Many women’s trisuits are built with integrated support, but if yours isn’t sufficient, a thin, quick-dry sports bra worn underneath is fine. Avoid anything with padding that retains water.

Is it legal to race without a top on the run in triathlon? In most sanctioned races, including ITU/World Triathlon and IRONMAN events, male athletes must be clothed from shoulder to hip on the run. Check your specific race rulebook – rules vary by federation.

What if my trisuit causes chafing on the run? Apply anti-chafe balm (Body Glide is widely used) at the neck, underarms, and inner thigh before the race. If the problem is structural – a seam in the wrong place – that’s a fit issue and worth trying a different suit before race day.

Do tri shorts work for swimming too? Yes. Tri shorts are designed to be worn throughout all three disciplines including the swim. They’re cut to reduce drag in the water compared to standard cycling shorts.

The Triathlon Bike Saddle Nobody Tests Until Mile 40 – And Why That’s a Race-Ruining Mistake

The Triathlon Bike Saddle Nobody Tests Until Mile 40 – And Why That’s a Race-Ruining Mistake

You spent six months researching your bike. You know the stack height, the reach, the weight of the carbon layup. You bought aero extensions and dialed your helmet position in a wind tunnel video on YouTube. And then you grabbed whatever saddle came stock on the frame, gave it a 20-minute shake-out ride, and called it good.

That decision will catch up with you. Usually around mile 40.

Saddle fit is the most neglected variable in triathlon bike setup – and unlike a flat tire or a dropped chain, there’s no fixing it mid-race. Here’s what you actually need to know before race day.

Why Are Tri Saddles Different From Road Saddles?

A triathlon-specific saddle is designed for an aggressive, forward-rotated hip position – not the more upright position of a road bike. That distinction matters more than most riders realize.

On a road bike, you’re sitting with a relatively neutral pelvic tilt. On a tri bike in an aero position, your pelvis rotates forward and your sit bones shift. You end up bearing weight on your pubic ramus – the front of your pelvis – rather than your ischial tuberosities (sit bones). A saddle built for road geometry puts pressure in exactly the wrong place when you’re locked into aero bars.

That’s why purpose-built tri saddles – like the ISM Adamo, Specialized Sitero, or Fizik Tritone – are typically shorter, flatter, and have a pronounced nose cutout or split design. They reduce pressure on soft tissue and support you in the specific position your tri bike demands.

Using a road saddle on a tri bike isn’t automatically a disaster, but it’s a gamble. And it’s a gamble most people don’t realize they’ve taken until the damage is done.

How Do You Actually Evaluate Saddle Fit for a Triathlon Position?

The only honest saddle test is time in the aero position – not a 15-minute spin, but at least 60-90 minutes at race-relevant effort. Most discomfort doesn’t surface until you’re fatigued and your form breaks down slightly.

Here’s a practical process:

  • Get a proper bike fit first. Saddle height, setback, and fore-aft position all interact with saddle shape. A fit done in an aggressive tri position (not a road position) is the baseline everything else builds from. Retül and Slowtwitch-certified fitters are worth finding.
  • Demo before you buy. Specialized, ISM, and Selle Italia all offer demo programs. Your local tri shop may carry loaners. There is no substitute for riding a saddle on your actual bike in your actual position.
  • Test on long rides, not short ones. Build up to 2-hour efforts in your aero position before committing. Discomfort that appears at 90 minutes won’t show up at 30.
  • Note where it hurts. Sit bone pain usually means width is wrong. Soft tissue or perineal pressure usually means nose angle is too high or you need a cutout design. Inner thigh chafing often points to a saddle that’s too wide for your riding position.

What Saddle Mistakes Do Triathletes Make Most Often?

The most common errors are using a stock saddle without testing it in position, setting nose tilt incorrectly, and skipping enough saddle time before a goal race.

A few specifics worth knowing:

  • Stock saddles are a compromise. Bike manufacturers spec saddles to keep costs down and showroom weight low. They are almost never chosen with your anatomy or your tri position in mind.
  • Nose angle is critical. Even a 1-2 degree upward tilt on the nose dramatically increases perineal pressure in an aero position. Most experienced fitters set tri saddles level or with a very slight nose-down angle.
  • Width matters differently in tri. Because weight shifts forward, a narrower saddle often works better on a tri bike than it would on a road bike – even for riders with wider sit bones.
  • Don’t introduce a new saddle within 8 weeks of your A-race. That’s not enough time to properly test and adapt.

Comparison: Road Saddle vs. Tri Saddle in an Aero Position

FeatureRoad SaddleTri-Specific Saddle
ShapeLonger, curvedShorter, flatter
Pressure pointSit bonesPubic ramus / front pelvis
Nose designStandardSplit, cutout, or blunt
Aero position suitabilityPoor to moderateDesigned for it
ExamplesFizik Arione, Selle SMP GliderISM Adamo, Specialized Sitero, Fizik Tritone

FAQ

How long should I test a new tri saddle before racing on it? Give yourself a minimum of 8 weeks, including at least 3-4 rides of 90 minutes or longer in your aero position. That’s enough time to identify problems and make adjustments before a goal race.

Can I use my road bike saddle on my tri bike? You can, but it often creates pressure in the wrong places because your hip angle changes significantly in the aero position. If you do, get a proper fit to ensure the saddle is set up correctly for that position.

What is the ISM Adamo and why do triathletes use it? The ISM Adamo is a widely-used tri saddle with a split nose design that eliminates the center pressure point entirely. It’s particularly effective for athletes who experience soft tissue discomfort in aero and has been a category benchmark since its widespread adoption around 2008-2010.

How do I know if my saddle width is right? A bike fitter can measure your sit bone width and cross-reference it with the saddle’s shape, but the real test is feel on long rides. Sit bone soreness after 60+ minutes often indicates a mismatch in width or padding density.

Does saddle height affect comfort in a tri position? Yes, significantly. A saddle set too high increases pelvic rocking, which creates friction and soft tissue irritation. A saddle set too low puts excess pressure on the front of the saddle. This is another reason to get fit before choosing your saddle.

The Bottom Line

Your saddle is the one piece of triathlon gear that’s in direct contact with your body for the entire bike leg. A 90g weight savings from a carbon frame upgrade means nothing if you’re suffering from mile 40 onward.

Test the saddle you actually plan to race on. Test it long, test it often, and test it in the position your tri bike demands. The investment is a few training rides and maybe a demo fee – far cheaper than a race you’ve spent months preparing for going sideways because of something you could have fixed in January.

The Triathlon Race Belt Nobody Respects – And Why It’s the Cheapest Performance Upgrade You’re Ignoring

The Triathlon Race Belt Nobody Respects – And Why It’s the Cheapest Performance Upgrade You’re Ignoring

You’ve spent $4,000 on a carbon bike, $600 on a wetsuit, and $200 on race-day running shoes. And then you clip a $12 piece of elastic around your waist and don’t think about it again.

That’s the race belt problem. It’s the only piece of triathlon gear that almost every athlete owns and almost none of them have actually evaluated. And in a sport where T2 transitions are won and lost in seconds, and a chafe point can end your run before mile three, that’s a mistake worth fixing.

Why Does a Race Belt Actually Matter for Triathlon Performance?

A race belt does one job: it lets you clip your race number to your body in seconds during T2, without fumbling with pins. Done right, it saves you 15-30 seconds in transition and keeps your kit clean. Done wrong, it rides up, spins around, digs into your hip, and turns a 10K into a misery session.

The belt itself isn’t glamorous. But the system – fit, clip placement, number position – is where most athletes get sloppy.

What Goes Wrong With Cheap Race Belts?

Most race belt failures come down to three things: elastic quality, buckle reliability, and number bounce.

Elastic degradation is the most common issue. Budget belts – especially unbranded ones under $8 – use low-grade elastic that stretches out after 10-15 uses. What started as a snug fit becomes a loose loop that rotates freely at race pace. Your number ends up on your hip or your back by mile two of the run, which is a DNF risk at events that require front-visible numbers.

Buckle failure is rarer but catastrophic when it happens. Snap buckles on low-end belts are usually rated for light lateral load. At race pace, especially if you tuck the belt under your trisuit, repeated flexion can crack the buckle. This has happened to athletes at Ironman 70.3 events – not often, but once is enough.

Number bounce is the most underrated nuisance. If your belt sits loose or too high on your torso, the number panel flaps with every stride. Over 10K, that’s thousands of small impacts worth of chafe against your forearm and abdomen.

Which Race Belts Actually Hold Up?

A handful of belts have earned consistent trust from athletes who race frequently enough to stress-test them.

  • Nathan Race Belt (~$12): The entry-level standard. Reliable buckle, decent elastic, loops hold number securely. Gets the job done for most sprint and Olympic distance athletes.
  • Race Ready Race Belt (~$14): Slightly wider elastic, which helps with rotation resistance. Popular at 70.3 distances where athletes are running longer.
  • Amphipod RunLite Race Belt (~$18): Better elastic quality, dual-loop design that reduces bounce. Worth the extra $6 if you race more than six times per year.
  • Ronhill Race Belt (~$15): UK-standard, used widely in European triathlons. Excellent buckle durability, flat profile sits well under a trisuit.

What you’re paying for at the $15-$20 price point isn’t branding – it’s elastic density and buckle construction. Both directly affect how the belt performs at the 90-minute mark of a race.

BeltPriceElastic QualityBuckleBest For
Nathan Race Belt$12GoodSolidSprint / Olympic
Race Ready$14Very GoodSolidOlympic / 70.3
Amphipod RunLite$18ExcellentExcellent70.3 / Full
Ronhill$15Very GoodExcellentAll distances

How Should You Fit and Set Up a Race Belt?

The belt should sit at your natural waist – not your hips, not your ribs. Snug enough that two fingers fit underneath with mild resistance. If you can slide a full hand under it, it will rotate.

Your number should sit centered on your front torso, below your chest. Thread it through both loops on the belt, not just one. Single-loop threading is the leading cause of number bounce.

If you’re wearing a trisuit, decide before race day whether the belt goes over or under. Over is faster in T2. Under is cleaner aerodynamically but adds a second or two to your transition.

Practice clipping it in T2 at least twice before your race. The buckle should click without you looking at it.

Frequently Asked Questions

Do I need a race belt for a triathlon? Yes, at almost every sanctioned triathlon. Race rules require your number to be visible on the run, and a race belt is the fastest way to comply without pinning anything to your kit.

Where should the race number face during the bike leg? To the back. Clip your belt with the number facing behind you during the bike, then rotate it to the front before the run. Most athletes do this while jogging out of T2.

Can I wear a race belt under my trisuit? Yes, but fit it on before you put the trisuit on. It’s difficult to adjust underneath mid-race, and a twisted belt under a trisuit is almost impossible to fix on the run course.

How long does a race belt last? A quality belt at the $15-$18 price point should last two to three seasons with regular use – roughly 20-30 races. Replace it when the elastic loses tension or the buckle starts clicking inconsistently.

Is there a performance difference between a $10 and $20 race belt? Yes, specifically in elastic retention and buckle longevity. The $10 belt works for a season. The $20 belt works for three – and is less likely to fail mid-race.

The Takeaway

You’re not going to find a race belt on any “game-changing gear” list. Nobody is posting about it on Instagram. But at a category where the difference between a good option and a bad one is $6, and the downside of getting it wrong is a ruined run split, it deserves five minutes of your attention.

Pick a belt with dense elastic, a reliable buckle, and a double-loop number system. Fit it at your waist, not your hips. Practice the T2 clip. Then forget about it – which is exactly what good race-day kit is supposed to let you do.

Triathlon Running Gear: The Complete Guide to Every Piece of Kit You Need

Triathlon Running Gear: The Complete Guide to Every Piece of Kit You Need

The run leg makes or breaks a triathlon. You’ve already swum and cycled – your legs are fatigued, your core is working overtime, and the gear you’re wearing needs to carry you across the finish line without slowing you down or causing problems. This guide covers every piece of triathlon running gear you need, from race-day shoes and trisuits to nutrition systems and performance accessories. Whether you’re toeing the start line of your first sprint or building toward a 70.3, you’ll find specific recommendations, honest trade-offs, and practical guidance on what’s worth spending money on – and what isn’t.

What Makes Triathlon Running Gear Different From Standard Running Gear?

Triathlon running gear is designed to work after two preceding disciplines, not in isolation – that distinction drives almost every design decision.

Standard running gear is optimised for comfort over a standalone run. Triathlon-specific gear is optimised for fast transitions, wet skin, sustained heat across multiple hours, and the unique biomechanical fatigue pattern that follows cycling. A thick-cushioned road shoe is excellent for a Sunday long run. It’s a liability in T2 when you’re trying to get it on over damp, swollen feet in under 20 seconds.

Key differences include:

  • No inner socks in race shoes (or elastic laces to avoid needing socks at all)
  • Quick-dry fabrics that don’t absorb water from the swim or sweat
  • Minimal seams to prevent chafing over long efforts
  • Ventilation priority over insulation
  • Secure but fast-to-don construction – buckles, BOA dials, or elastic lacing over traditional knots

Understanding this context stops you from making expensive mistakes – like buying a technically excellent running shoe that’s a nightmare in a race transition.

What Triathlon Running Shoes Do You Actually Need?

The right triathlon running shoe fits well while wet, goes on quickly, and holds up over the distance you’re racing.

Sprint and Olympic Distance Shoe Priorities

For shorter races (up to 10km run legs), transition speed matters more than long-run cushioning. Look for:

  • Elastic or speed laces – brands like Xtenex, Caterpy, or the built-in elastic systems on Hoka and New Balance tri editions
  • Heel loops – a simple loop at the collar lets you drag the shoe on without using your hands to open it
  • Breathable mesh uppers that drain water quickly if your feet are still damp from T1

Strong performers in this category include the New Balance FuelCell SuperComp Pacer and the Saucony Kinvara Pro – both fast, light, and adaptable to race lacing.

Half and Full Iron-Distance Shoe Priorities

For 13.1- to 26.2-mile run legs, the calculation shifts. You need cushioning and fit stability that holds up after 56 or 112 miles on a bike. This is where a shoe like the Hoka Rincon 3 or the ASICS Novablast 4 earns its place – they combine enough cushioning for late-race comfort with a streamlined enough fit to go on quickly in T2.

One practical note: at 70.3 and full Ironman distances, most athletes are better off with a sock (to prevent blistering over 13+ miles) than chasing a slightly faster transition. Pre-position a thin no-show tri sock inside your shoe in transition setup.

Do You Need Triathlon-Specific Running Shoes?

No – you need a running shoe that works under triathlon conditions. True tri-specific running shoes (like older Zoot or De Suca models) are less common now because mainstream performance running shoes, with the right lacing modification, are equally capable. The label matters less than the features.

Which Trisuit Is Best for the Run Leg?

A trisuit needs to function across all three disciplines, but its construction has a significant effect on run comfort specifically.

What to Look for in a Trisuit for Running

The chamois (padding) is the most important run-specific factor in a trisuit. A chamois that’s thick enough to protect on the bike becomes a heavy, uncomfortable problem on the run. Look for suits with a thin, quick-dry chamois – typically 5-8mm – rather than the 10-15mm pads found in standard cycling bib shorts.

Other run-specific trisuit considerations:

  • Compression level – moderate compression through the hip and quad supports run form without restricting stride
  • Flatlock seams on the inner thigh and waistband prevent hot spots over long run legs
  • Back pockets – a single small pocket is useful for a gel or CO2; avoid suits where back pockets add bulk to the shoulder or neck area, which causes chafing during the run arm swing
  • Fabric breathability – materials like Elastic Interface, Compressport’s R2, or Castelli’s KISS Air chamois fabrics manage heat and moisture well

Well-regarded trisuits for run comfort include the Castelli Free Sanremo 2 (excellent all-round performance, reliable chamois) and the Compressport Triathlon Brutal Suit (strong compression, fast-drying, good for hotter conditions).

One-Piece vs. Two-Piece: What’s Better for the Run?

For most triathletes, a one-piece trisuit is the better choice – there’s no waistband to dig in, no top riding up, and no chance of the two pieces separating mid-run. Two-piece setups (tri shorts plus top) offer flexibility for fit and temperature regulation but introduce more chafing risk over long run legs.

What Socks Do Triathletes Need for the Run?

For sprint and Olympic distances, many experienced triathletes run sockless to save transition time. For anything longer, socks are almost always the right call.

Tri-specific socks like those from Balega, Swiftwick, or Zensah are thinner than standard running socks, wick moisture aggressively, and have minimal seaming at the toe. They’re designed to go on quickly over wet or damp feet.

Key specs to look for:

  • No-show cut – sits below the collar of the shoe and doesn’t bunch
  • Compression fit at the arch – keeps the sock from sliding during the run
  • Moisture-wicking fiber – merino blends or synthetic (CoolMax, Drymax) outperform cotton entirely

Avoid thick trail-running socks for triathlon run legs. They absorb sweat, take longer to put on, and can cause blistering once wet.

What Running Accessories Are Worth Carrying on Race Day?

Every gram and every second counts on race day. The accessories worth using are the ones that either protect your performance or prevent a race-ending problem.

GPS Watch

A GPS watch is the single most useful piece of triathlon running gear outside of shoes. It lets you manage your run pace from the first step out of T2 – critical, because adrenaline and bike fatigue combine to make effort feel misleading early in the run leg.

Garmin Forerunner 965 and Polar Vantage V3 are the current benchmarks for triathlon-focused watches. Both offer multisport mode (continuous tracking across swim, bike, run without losing data), running power, and heart rate. The Apple Watch Ultra 2 is a capable alternative for athletes already in the Apple ecosystem, though its triathlon multisport integration is less seamless than dedicated triathlon watches.

At minimum, use the watch to confirm your first-kilometre pace – if you’re 15-20 seconds per kilometre faster than your target, you’re already in deficit spending.

Running Hat or Visor

Sun exposure on the run leg, especially in half and full iron-distance events that put athletes on the course in midday heat, is a genuine performance issue. A lightweight running cap or visor can reduce core temperature perception meaningfully.

  • Headsweats Supervisor and Brooks Chaser are popular choices – both are light, vent well, and have sweatbands that don’t saturate quickly
  • A visor is slightly cooler than a cap but offers less UV protection on the top of the head
  • Pre-position the cap in T2 or, at longer distances, consider aid-station ice placement under the cap from mile 3 onwards

Sunglasses

Sunglasses aren’t optional on bright-day races – squinting for 40 minutes degrades run form through neck and shoulder tension. Keep the same pair from the bike or switch to a lighter frame in T2.

  • Oakley Sutro Lite or Rudy Project Spinshield Air are solid tri-crossover options
  • Transition tip: pre-position sunglasses open on top of your run shoes so you can slide them on in a single movement

Race Number Belt

A race number belt is a small item with a real impact on transition speed. Clipping a pre-set number belt takes two seconds. Pinning a number to your trisuit takes two minutes and risks damaging the fabric.

Nathan SpeedDraw, Flip Belt, and basic elastic belts from Ronhill or HUUB all work well. Choose one with at least one gel loop if you’re carrying your own nutrition rather than relying entirely on course stations.

How Should Triathletes Handle Nutrition on the Run Leg?

Triathlon run nutrition means managing a deficit you built up over the swim and bike, not starting fresh.

What to Carry vs. What to Take at Aid Stations

At sprint and Olympic distances, most athletes can rely on course aid stations alone (water and electrolyte drink every 2-3km). At 70.3 and Ironman distances, you need a personal nutrition plan that uses the course stations as a baseline and fills gaps with your own tested products.

What to carry on the run:

  • 1-3 gels in your trisuit back pocket or on a race belt gel loop (for a 70.3 run leg, aim for one gel every 30-40 minutes depending on body weight and intensity)
  • A small salt capsule (SaltStick, Precision Hydration, or Nuun Sport tabs) if you’re racing in heat above 25°C
  • Nothing else – weight adds up and most mid-distance runners can manage on aid station fluids with a small personal gel supply

What to avoid:

  • Solid food (bars, bananas) in the first 30 minutes of the run leg – gastric motility is suppressed early in the run transition from bike and solids can cause nausea
  • Trying new products on race day – this is obvious advice, but athletes still do it. Every gel or drink you take on race day should have been tested in training

Hydration Strategy

Drink to thirst on runs under 90 minutes. For longer run legs, use a time-based approach: small sips (150-200ml) every 15-20 minutes from course stations, supplemented with electrolytes if you’re a heavy sweater or racing in heat.

What Training Equipment Do Triathletes Use to Improve Run Performance?

Race-day gear gets the attention, but training equipment is what actually builds the run leg.

Foam Rollers and Recovery Tools

Running off the bike creates specific tightness patterns – hip flexors, IT band, and calves bear the brunt of the bike-to-run transition. A foam roller (the Trigger Point GRID remains the reliable standard) and a lacrosse ball for targeted hip flexor work are the two most cost-effective recovery tools in a triathlete’s kit.

Percussion massage devices like the Therabody Theragun Prime are effective post-run and pre-run activation tools, particularly for cyclists who struggle with quad activation when the run starts. They’re a genuine investment at £249-£299, but durable and useful across all three disciplines.

Brick Training and the Gear Setup It Requires

Brick workouts (bike followed immediately by run) are the most sport-specific training sessions a triathlete does. To run these sessions effectively, you need:

  • Your race-day run shoes already set up by the bike
  • Your GPS watch in multisport mode to track the transition
  • If training outdoors, a simple transition spot – a towel, shoes, and your run number
  • If using a turbo trainer for the bike portion, easy access to your run gear for a T2 simulation

Running your first few bricks in race kit (including your trisuit and race shoes) helps identify fit or comfort problems before race day, not during it.

Strength and Conditioning Equipment for the Run Leg

A single resistance band (particularly a hip circle from brands like Perform Better or Gymreapers) is one of the most efficient pieces of triathlon training equipment for the run. Hip abductor and glute activation work with a band directly addresses the quad dominance that cycling creates – a major contributor to poor run form in the first few kilometres off the bike.

Other useful items:

  • Calf raise platform for eccentric loading, which reduces Achilles and plantar fascia issues common in high-volume triathlon training
  • Jump rope for foot turnover and proprioception work (less joint stress than plyometric drills on hard surfaces)
  • GPS/running power meter – the Stryd pod (clips to shoe laces) gives running power data that’s more consistent than GPS pace on hilly courses and in wind

What’s the Difference Between Budget and Performance Triathlon Running Gear?

Budget gear gets you to the finish line. Performance gear makes the experience faster and more comfortable – but the returns diminish quickly above a certain price point.

CategoryBudget OptionMid-Range OptionPerformance Option
Run shoesSaucony Kinvara 14 (~£100)Hoka Rincon 3 (~£130)New Balance FuelCell SuperComp Pacer (~£200)
TrisuitZone3 Activate (~£65)HUUB Commit Long Course (~£130)Castelli Free Sanremo 2 (~£280)
GPS WatchGarmin Forerunner 55 (~£170)Garmin Forerunner 265 (~£350)Garmin Forerunner 965 (~£580)
Race SocksBalega Hidden Comfort (~£14)Swiftwick Aspire Zero (~£16)Zensah Tech+ (~£20)
Race BeltRonhill Race Belt (~£8)Nathan Race Number Belt (~£12)Flip Belt (~£30)

Honest take: The biggest performance returns come from shoes and watch – not from premium trisuits or race belts. A £65 trisuit on a well-trained athlete will beat a £280 trisuit on an undertrained one. Spend where the gear directly affects output (shoes, watch), save where it doesn’t (belts, caps, basic socks).

Frequently Asked Questions About Triathlon Running Gear

Do I need triathlon-specific running shoes, or can I use regular running shoes? You don’t need shoes marketed specifically as “triathlon” shoes. You need running shoes that fit well while wet, go on quickly, and suit your foot type and the distance you’re racing. Most modern performance running shoes, fitted with elastic laces, meet those requirements. Brands like Zoot still make tri-specific models, but they’re not necessary.

Should I wear socks for the run leg in a triathlon? For sprint distances (up to 5km run), sockless is viable if your shoes fit well and you’ve trained sockless. For Olympic distance and above, socks are strongly recommended – the blister risk over 10km+ outweighs the 10-15 second transition saving for most athletes.

How do I stop my legs from feeling dead at the start of the run leg? The heavy, fatigued feeling in the first 1-2km of the run is normal and largely unrelated to fitness – it’s the biomechanical shift from cycling muscles to running muscles. Regular brick workouts (bike straight into run) train your body to make this switch faster. From a gear standpoint, a well-fitted trisuit with moderate compression through the quad can help with proprioception and early-leg feel.

What should I put in my T2 transition for the run leg? At minimum: shoes (with elastic laces pre-tied), race number belt (pre-clipped with number attached), and any nutrition you’re carrying. Optional additions: cap or visor, sunglasses (pre-opened on your shoes), socks (pre-positioned inside shoes if using them). Keep T2 simple – every extra item is a decision point under fatigue.

Is a running power meter worth it for triathlon training? For athletes who train consistently by data and already use a cycling power meter, adding a Stryd running power pod is a logical next step. It costs around £200 and provides consistent effort data that GPS pace alone can’t give on variable terrain. For athletes newer to data-based training, mastering heart rate and perceived exertion first is more practical.

Conclusion

Triathlon running gear isn’t about collecting every available piece of kit – it’s about knowing which items solve real problems and which are marketing noise. Your shoes and your watch matter most. Your trisuit needs a chamois that works on both the bike and the run. Your accessories need to be fast to put on and light enough to forget you’re wearing them.

Start with the essentials: a well-fitted pair of race-ready running shoes with elastic laces, a reliable trisuit, a GPS watch in multisport mode, and a race belt. Everything else – recovery tools, running power meters, compression socks, specialty nutrition systems – builds on top of that foundation once you understand what your run leg actually needs.

Test everything in training. Set up your T2 exactly as it will be on race day. And remember that the best piece of triathlon running gear is the one you’ve trained in enough to trust completely.

In this guide

Triathlon Race Belt vs. Pinned Number: Which Is Faster for the Run Leg?

This article is part of our complete guide: Triathlon Running Gear: The Complete Guide to Every Piece of Kit You Need.

Triathlon Race Belt vs. Pinned Number: Which Is Faster for the Run Leg?

Every second you spend in T2 is a second added to your finish time. How you attach your race number to your kit matters more than most triathletes think – and the choice between a triathlon race belt for running and a traditionally pinned number is one of the clearest gear decisions you can make before race day.

Here’s the honest breakdown.

What Actually Happens in T2 With Each Option?

The short answer: A race belt can be clipped on in under five seconds. Pinning a race number takes two to three minutes before the race and cannot be adjusted mid-run.

With a pinned number, you have two choices. You can pin it to your trisuit before the race starts, which means swimming and cycling with a number flapping against your body or folded awkwardly under a wetsuit. Or you pin it onto a separate run top in transition, which costs you time and coordination when your hands are tired and your heart rate is already elevated coming off the bike.

A triathlon race belt threads through a small number bib and clips around your waist in a single motion. You grab it from your T2 bag or rack, clip it on as you move toward the run exit, and go. Most experienced triathletes – from age-groupers to Ironman finishers – report this transition taking three to five seconds once they’ve practiced it a few times.

Does a Race Belt Actually Save Race-Day Time?

The short answer: Yes, consistently – and it adds up across a full race, especially in longer formats where transition fluency matters.

At events like Ironman World Championship and Challenge Roth, elite amateur athletes routinely record T2 times under 90 seconds. The difference between a smooth belt clip and fumbling with safety pins in transition can be 30 to 60 seconds, which in a competitive age group is the difference between a podium and missing it.

Even at a local sprint triathlon, cutting T2 by 45 seconds is more achievable than shaving 45 seconds off your 5K run. The belt is low-hanging fruit.

Beyond raw speed, there’s another advantage: a race belt lets you wear your trisuit continuously from swim to finish without any layering. You start the swim, exit, clip the belt in transition, and run. No extra clothing changes required.

Are There Any Legitimate Reasons to Use Pins Instead?

The short answer: Rarely – but some races require a specific number placement that only pinning can achieve, and budget triathletes may not have a belt on hand.

A few race formats with unusual rules (some local or club events) specify that numbers must be pinned directly to a garment. Always check your race briefing document. Most sanctioned triathlon events – including those governed by World Triathlon and IRONMAN – accept race belts as valid number display methods for the run leg.

Pinning also makes sense in one specific scenario: if you’re doing an open-water swim only, or a purely run-based event where transitions aren’t a factor. For any multi-discipline race with T2 involved, pinning offers no real advantage.

One fair point in favour of pins: they’re free. A race belt typically costs between $8 and $25. Brands like Nathan, USWE, and Raceday Belt offer reliable options in that range. If you’re racing on a very tight budget, pins get the job done – just don’t expect speed.

What Should You Look for in a Triathlon Race Belt for Running?

The short answer: Prioritise a secure clip mechanism, easy number threading, minimal bounce at race pace, and enough loops to hold your number flat.

Here’s what separates a useful race belt from an annoying one:

  • Clip mechanism: Should snap shut with one hand. Side-release buckles (the same type used on hydration vests) are standard and reliable.
  • Number loops: Look for at least four loops to keep the bib flat at speed. Fewer loops mean the number curls and flaps, which can irritate officials at events that require visible bib numbers.
  • Adjustability: A simple sliding adjuster lets you wear the belt over a wetsuit or directly on a trisuit without re-threading.
  • Gel loops: Some belts – the Nathan Triathlon Race Belt and Raceday Belt Pro, for example – include small loops for gels. Useful if you’re not running with a vest or pockets.
  • Weight: Good belts weigh under 30 grams. You shouldn’t notice it’s there.

Avoid belts with velcro closures. They degrade quickly with repeated washing and can snag on a trisuit during a fast T2.

How Do You Set Up a Race Belt Correctly in Transition?

The short answer: Pre-thread your number bib onto the belt the night before, set the belt with the number facing the back, and place it on top of your run gear in T2 so it’s the last thing you pick up.

Here’s a reliable T2 race belt routine:

1. Thread your number bib through all four loops the evening before race day. 2. Clip the belt closed and hang it over your running shoes in T2 or lay it on top of your run kit. 3. As you rack your bike post-ride, grab the belt and clip it at your back. The clip takes one second. 4. Rotate the belt so the number faces forward as you jog to the run exit. Most athletes do this automatically within five steps.

Practice this in training at least twice before race day. Run through the full T2 sequence at home – helmet off, shoes on, belt clipped – so the sequence is automatic when your legs are full of lactic acid and adrenaline is high.

FAQ

Can I use a race belt instead of pinning my number in any triathlon? In most sanctioned triathlons – including IRONMAN, 70.3, and World Triathlon events – race belts are accepted for the run leg. Always confirm with your specific race’s athlete guide before assuming.

Where should the race number face during the bike and run? Most triathlon rules require your number to face the front during the run and the back (or either side) during the bike. A race belt makes this easy: wear it facing back on the bike, rotate it forward for the run.

How much does a decent triathlon race belt cost? Reliable race belts start at around $8 to $12 for basic models (such as the Nathan Race Day Belt) and go up to $20 to $25 for belts with gel loops and adjustable sizing, like the Raceday Belt Pro or the USWE Race Belt.

Can a race belt hold enough gels for a half or full Ironman run? A belt with gel loops can carry four to six standard gels, which covers most half-Ironman run legs. For a full Ironman marathon, most athletes supplement with course aid station nutrition rather than carrying everything on the belt.

Will a race belt bounce or shift during the run? A correctly sized and adjusted belt should not bounce. If yours moves, tighten the adjuster. Running with the number bib threaded through all available loops also adds stability by distributing the weight evenly.

For a full breakdown of every piece of kit you need for the run leg – shoes, socks, GPS watches, and more – see our complete guide: Triathlon Running Gear: The Complete Guide to Every Piece of Kit You Need.

The Triathlon Brick Workout Gear Checklist Nobody Hands You at Sign-Up

The Triathlon Brick Workout Gear Checklist Nobody Hands You at Sign-Up

You can nail a solo 40-mile ride. You can run a comfortable 10K off the couch. Put them back-to-back and suddenly your cycling shoes feel like bear traps, your helmet strap is chafing a line across your chin, and your run hat is dumping salt-crust directly into your left eye by mile two.

Brick sessions break gear that individual training never touches. Here’s what to actually check – and fix – before race day finds out for you.

What Gear Problems Do Brick Workouts Expose That Solo Training Doesn’t?

Brick workouts reveal fit, friction, and function issues that only appear when your body is already fatigued and switching disciplines fast. A cycling shoe that clips in fine at minute zero becomes a coordination problem when your quads are cooked from 90 minutes in the saddle.

The transition is the stress test. That’s where buckles fumble, laces snag, and elastic waistbands that felt fine in the car suddenly dig in like a tourniquet. Most gear failures in triathlon happen in T2, not on the course.

Which Cycling Shoe Features Matter Most for Brick Training?

For brick sessions specifically, prioritize closure systems you can operate with shaking hands and compromised fine motor control. A three-strap Velcro setup that works perfectly fresh can take 45 seconds when your legs are trashed – 45 seconds that compounds straight into your run pacing.

What to look for:

  • Single BOA dial closure (like those on the Giro Regime or Shimano RC702) – one twist, done
  • Wide heel tabs for fast entry when shoes are pre-clipped to the pedals
  • Stiff carbon or composite soles rated 8-10 on the stiffness index to reduce energy leak on the bike without punishing your feet before the run

Practice T1 specifically: clip your shoes to the pedals before the session starts, run to the bike in socks or barefoot, and mount moving if your course allows it. Do this at least four times in training before race day.

What Should Your Trisuit Handle During a Brick Workout?

A good trisuit is the single piece of kit that has to perform across all three disciplines without a change, so fit issues that feel minor during a swim will become serious irritants 60 minutes into the bike. The chamois pad is the main variable – too thick and you’re waddling on the run; too thin and the saddle wins by mile 20.

During brick sessions, specifically check for:

  • Shoulder seam chafe that appears only after 30+ minutes of running following a bike leg – it’s invisible in the pool
  • Leg gripper roll-up on the run, common in cheaper trisuits with narrow silicone bands
  • Chest compression from swim-optimized suits that restricts breathing once you’re pushing harder on the bike

Suits like the Castelli Free Sanremo and Zone3 Aeroforce perform well across disciplines because they balance chamois thickness (roughly 6-8mm is the sweet spot for most athletes) with run-ready leg cut.

How Should You Set Up Your Run Gear for a Fast T2?

The goal in T2 is zero decision-making – every piece of run gear should be pre-positioned so you can put it on without looking. Elastic laces (Xtenex or Lock Laces are the standard choices) cut transition time by 20-30 seconds compared to standard laces, which matters as much in training as it does on race day.

Brick-specific run gear checklist:

  • Running shoes pre-laced elastic and opened wide – test this on your actual race shoe model, not all of them open the same way
  • Race number belt clipped and ready, not folded in a bag
  • Run hat or visor placed brim-down so you can flip it straight onto your head without adjusting
  • Nutrition already in the shoe or belt pocket, not loose in a transition bag

One thing most guides skip: practice putting on your run shoes while standing, not sitting. In most races, there’s no chair. If you’ve only practiced seated, you’ll lose time and balance in T2.

FAQ: Brick Workout Gear Questions

Do I need separate shoes for brick training vs. racing? Not necessarily, but train in your race shoes during bricks. Fit behavior changes when you’re fatigued, and you want to know about any problems before race morning.

How thick should a trisuit chamois be for sprint vs. Ironman distance? For sprints and Olympics, 4-6mm is usually enough. For 70.3 and full Ironman distances, 6-10mm gives meaningful comfort without wrecking your run stride.

Can I use regular running shoes for brick sessions? Yes, but use the exact pair you’ll race in – rubber compounds, stack height, and heel drop all affect how your legs respond to the bike-to-run transition, and you want your neuromuscular system adapted to that specific shoe.

What’s the most common gear mistake in brick training? Treating the brick like two separate workouts in terms of gear prep. Everything should be laid out and practiced as one continuous session, transitions included.

How often should I do brick sessions before a race? For an Olympic-distance race, aim for one brick per week in the final six weeks. Each session is a gear rehearsal as much as a fitness session – use it that way.

The Bottom Line

Brick workouts are where gear either earns its place on race day or gets cut from the roster. Run four or five proper brick sessions before your next race, treat every gear issue as data, and you’ll cross the finish line with zero surprises – which is exactly the point.

The Triathlon Race Belt Nobody Respects – And Why It’s the Sneakiest Time-Saver in Your Kit

The Triathlon Race Belt Nobody Respects – And Why It’s the Sneakiest Time-Saver in Your Kit

You’ve spent $280 on a trisuit, $400 on race wheels, and 45 minutes researching the best race-day nutrition strategy. Your race belt? You grabbed whichever one was on the peg at your local tri shop for $12 and never thought about it again.

That’s exactly the problem.

The race belt is the one piece of triathlon gear that touches literally every race you do – it holds your number, it lives in T2, and it affects how smoothly that run leg starts. And almost no one has spent more than three minutes optimizing it.

Why Does a Race Belt Actually Matter for Race-Day Performance?

A poorly set-up race belt costs you 5-15 seconds in T2 and can cause number flap, clip failures, and mid-run irritation – all avoidable with about ten minutes of pre-race attention.

That doesn’t sound like much until you remember that most age-groupers finish within 30 seconds of each other in their category. A fumbled belt clip while your fingers are numb from the bike is not a theoretical problem. It’s a race-morning problem.

The mechanics are simple: in T2 you’re already dealing with helmet removal, bike racking, and a shoe change. The belt should spin to the front in one clean motion and clip in one click. If it doesn’t, you’re doing a second or third attempt with your heart rate still elevated from the bike.

What’s the Difference Between a Good Race Belt and a Bad One?

The meaningful differences come down to clip mechanism, elastic quality, and loop spacing – not brand prestige.

Here’s what separates a race belt worth keeping from one worth replacing:

  • Clip mechanism: Magnetic closures (used on the NNathan SpeedClip and the Ronhill Race Belt) snap shut reliably even with wet or cold hands. Standard plastic side-release buckles work fine when dry, less so when you’ve just climbed off a bike in a British autumn race.
  • Elastic tension: Cheap belts go slack after six months of washing. The elastic on something like the Tridot Race Belt stays snug enough to stop the number flapping at pace without riding up your trisuit.
  • Loop spacing: Loops spaced 2-3 inches apart let you distribute your number evenly and prevent corner-flap. Fewer loops mean the number hinges off a single attachment point and flaps with every stride.
  • Gel loops: Some belts – the Fuel Belt Helium and the Amphipod Micropack – include small loops sized for gel packets. If you’re carrying nutrition on the run rather than relying solely on course aid stations, this matters.

How Should You Set Up a Race Belt in T2?

Lay your race belt in T2 with the number already facing down, elastic pre-stretched to your waist size, and the clip positioned to your right hip – so you grab, wrap, and click in a single motion.

Most athletes drop the belt loose in their transition box and fumble with it in the moment. Instead:

1. Attach your number the night before. Use all four corners. 2. Pre-set the elastic to your exact waist measurement. Don’t adjust it on race morning. 3. Lay it number-side down in your run shoe or across the top of your run kit, clip pointing outward. 4. Practice the grab-wrap-click motion at home. Seriously – do it ten times.

The whole sequence should take under four seconds. If it’s taking longer in practice, it’ll take longer under race pressure.

Should You Carry Gels on Your Race Belt?

For sprint and Olympic-distance races, probably not – you can pre-load nutrition and rely on aid stations. For 70.3 and full-distance racing, a belt with gel loops gives you an additional carrying option without pockets.

The caveat: gels on a belt bounce more than gels in a trisuit pocket. If you’re racing in a trisuit with rear pockets (like the Castelli Free Sanremo or Huub Anemone), use those first. The belt’s gel loops work best as overflow storage or as a backup when your suit doesn’t have pockets.

Frequently Asked Questions

Do I need a race belt or can I just pin my number to my trisuit? Pinning works but damages your trisuit fabric over time and means you’re wearing your number during the bike leg (which some races require, but many don’t). A belt lets you flip the number to your back for the bike and front for the run in seconds.

What’s a reliable race belt that won’t break the bank? The Nathan SpeedClip Race Belt (~$14) and the Ronhill Race Belt (~$12) both have solid magnetic or clip mechanisms and last several seasons with basic care. Neither will let you down in a race.

How do I stop my race number from flapping during the run? Use all four corner loops on the belt, not just two. If the number still flaps, add a small safety pin through the bottom two corners into your trisuit – it takes 20 seconds and makes a real difference at pace.

Can I use the same race belt for every race distance? Yes. One well-set-up belt works from sprint to full Ironman. The setup decisions (gel loops, clip type) matter more than buying different belts for different distances.

How often should I replace a race belt? When the elastic loses tension or the clip starts sticking. For most athletes racing 4-6 times a year, that’s every two to three seasons. At $12-$15 a replacement, there’s no reason to push it past its useful life.

The Takeaway

You don’t need to spend more money here. You need to spend more attention. A $15 race belt, properly set up and practiced with, will give you a cleaner T2 than a $30 belt you’ve never thought about. Sort the clip, set the elastic, lay it out right, and run.

The gains in triathlon rarely come from the most expensive item in your kit. Sometimes they come from the one you’ve been ignoring since your first race.